
Personal life took some time from work, but I’m almost done level four — just the bosses left to touch up / balance. In the meantime, let’s explore render targets a bit, since I used those this week!

The fourth level takes place on the hull of the warship, and at some point it starts heating up as it breaks the Earth’s atmosphere (interesting scenarios trump scientific accuracy, obviously.) You’ll notice the issue I was running into — you can see this weird grid effect when the ship glows.
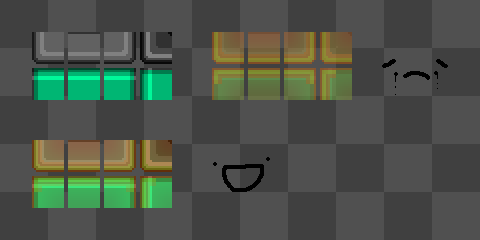
So what up with that? Well, the ship is drawn using tiles, and in this case I’m using two tilesets — one where the warship looks normal, and one where it’s all fiery. The hotter the warship gets, the more opaque the fiery tileset becomes. The problem is that tiles overlap slightly — you never notice when they’re opaque, but when they’re transparent the overlapping edges blend together and cause that nasty grid effect.

How ya gonna fix it? I used a render target!
To simply explain: usually you draw your game’s graphics right on to the screen — the screen is your game’s “render target”. But it doesn’t have to be this way! It’s totally possible to create other render targets that aren’t visible on-screen, and draw graphics there. Why would you do this…?

Here’s an example! I take a screenshot of gameplay and save it in a render target, then flip / squish / colour it to be a reflection. It’s simple but it looks good enough to me.
Even more relevantly, it solved my tile issues! Instead of drawing a translucent tileset on top of an opaque one in real-time, I blend them together in a render target first. This gives me a perfectly-combined — and opaque! — tileset which I use to draw the tiles of the ship.
As a bonus, it’s easier for the graphics card since instead of two draws per tile (once for the normal warship and once again for the fiery version) it only needs one.
And there you have it! There’s a lot (lot) more you can do with render targets, including some cute and cool effects I have planned for later in the game (but won’t show now.)
Hopefully the next blog is my wrapping up the fourth level with a ribbon and a bow. ‘Till then!